Your car’s engine oil is the lifeblood of its smooth operation. It lubricates moving parts, reduces friction, and helps maintain engine temperature. Regularly checking your engine oil level is a crucial part of preventive car maintenance. This simple task can help you identify potential problems early on and prevent costly repairs down the road.
In this comprehensive guide, we’ll delve into everything you need to know about checking your engine oil level, from understanding the importance to the step-by-step process.
Why Checking Engine Oil Level Matters
Engine oil performs several critical functions within your car’s engine.
- Lubrication: Oil creates a slippery film between moving parts, reducing friction and wear and tear. Without proper lubrication, these parts could grind together, causing significant damage.
- Cooling: Engine oil absorbs heat generated by friction and carries it away from critical components, helping to maintain a stable operating temperature.
- Cleaning: Oil helps suspend dirt and debris generated by engine operation, preventing them from accumulating and causing harm.
- Sealing: Oil forms a seal between pistons and cylinder walls, ensuring optimal compression and engine performance.
By regularly checking your engine oil level, you can ensure there’s enough oil to perform these vital tasks. An oil level that’s too low can lead to increased friction, overheating, and even engine seizure. Conversely, overfilling the crankcase can also cause problems, such as damaging engine seals or creating excessive pressure.
Understanding Your Car’s Dipstick
The dipstick is a vital tool for measuring your engine oil level. It’s typically a long, thin metal rod with a brightly colored handle (often yellow or orange) and markings on the end to indicate the proper oil level range. The dipstick is usually located on the top of the engine block, near the oil filler cap.
While the general location of the dipstick is consistent across most vehicles, it’s always a good practice to consult your car’s owner’s manual for the exact location and proper checking procedure specific to your model.
Here’s a breakdown of the key components of a dipstick:
- Handle: The brightly colored handle makes the dipstick easy to identify and remove.
- Dipstick Tube: This tube houses the dipstick and provides a passage for checking the oil level.
- Markings: The dipstick will have markings or hatched areas indicating the minimum and maximum safe oil levels for your engine. These markings may be denoted by lines or phrases like “MIN” and “MAX.”
Step-by-Step Guide to Checking Engine Oil Level
Checking your engine oil level is a straightforward process that can be done in just a few minutes. Here’s a step-by-step guide:
- Park on Level Ground: Ensure your car is parked on a level surface. This will provide an accurate reading when you check the oil level.
- Turn Off the Engine: Let your engine cool down completely for at least 30 minutes before checking the oil level. Hot oil can burn you and may not provide an accurate reading as some oil will still be circulating within the engine.
- Locate the Dipstick: Pop the hood open and identify the dipstick using your owner’s manual or by looking for a brightly colored handle near the top of the engine block.
- Remove and Wipe the Dipstick: Pull out the dipstick slowly and carefully. Wipe the dipstick clean with a rag or paper towel to remove any oil residue. A clean dipstick will provide a more accurate reading.
- Reinsert and Remove the Dipstick: Push the clean dipstick back into its tube all the way down. Then, pull it out again slowly.
- Read the Oil Level: Hold the dipstick upright and look at the oil film on the marked area. The oil level should fall between the minimum (MIN) and maximum (MAX) markings on the dipstick.
Interpreting the Reading:
- Oil Level Between MIN and MAX: This indicates your engine has a good oil level. No further action is needed at this time.
- Oil Level Below MIN: Your engine oil level is low. You’ll need to add oil to bring it back within the safe range.
- Oil Level Above MAX: Your engine is overfilled with oil. This can be just as dangerous as a low oil level. Consult your owner’s manual for instructions on how to remove excess oil.
Choosing the Right Engine Oil
Not all engine oils are created equal. For optimal performance and protection, it’s crucial to use the engine oil recommended by your car’s manufacturer. This information can be found in your owner’s manual.
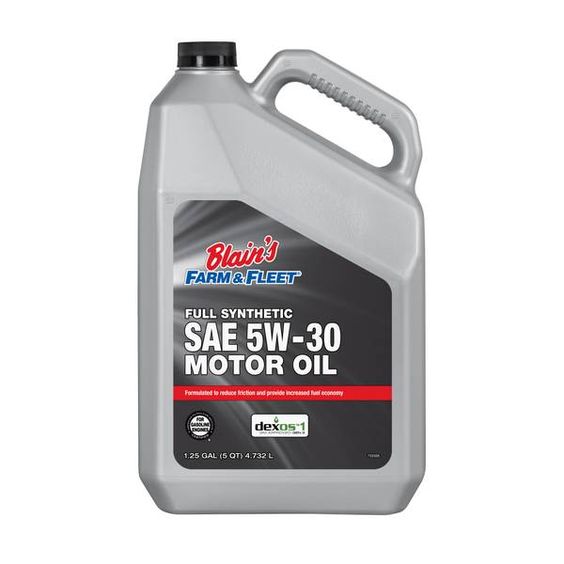
Engine oil viscosity, indicated by a grade like 5W-30 or 10W-40, is a key factor to consider. The first number (e.g., 5W or 10W) represents the oil’s viscosity at cold temperatures, affecting how easily it flows during startup. The second number (e.g., 30 or 40) indicates the oil’s viscosity at operating temperatures, impacting its ability to lubricate moving parts.
- Consult Your Owner’s Manual: Always refer to your car’s owner’s manual for the exact recommended engine oil type and viscosity grade. Using the wrong oil can compromise your engine’s performance and lifespan.
Adding Engine Oil (Continued)
Once you have the appropriate engine oil, here’s how to add it safely:
- Locate the Oil Filler Cap: The oil filler cap is typically located on the top of the engine block and will often have an oil can symbol on it.
- Remove the Cap: Unscrew the oil filler cap carefully. Be cautious, as there may be residual pressure that could cause a small amount of oil to splatter out.
- Add Oil Slowly: Using a funnel to avoid spills, add oil in small quantities, typically around half a quart at a time.
- Check the Dipstick Level After Each Addition: After adding oil, replace the dipstick, push it all the way down, and remove it again to check the oil level. Repeat this process of adding small amounts of oil and checking the dipstick level until the oil reaches the recommended range between the MIN and MAX markings.
Important Tips:
- Don’t Overfill: Avoid exceeding the MAX level on the dipstick. Overfilling can cause engine problems.
- Wipe Up Spills: Clean up any oil spills immediately to prevent engine compartment fires and to avoid a slippery mess.
- Dispose of Used Oil Properly: Don’t throw used oil in the trash or down the drain. Take it to a designated oil recycling center.
Additional Tips for Maintaining Healthy Engine Oil
- Regular Oil Changes: Following the recommended oil change schedule in your owner’s manual is crucial for maintaining clean and effective engine oil. Oil degrades over time and loses its lubricating properties.
- Monitor Oil Color and Condition: During oil checks, take a moment to inspect the color and consistency of the oil on the dipstick. Fresh oil is typically light brown or amber. Dark brown or black oil indicates it’s time for a change. If the oil appears gritty or sludgy, it could signify internal engine problems. Consult a mechanic if you notice any abnormalities.
- Top Up Oil Between Changes: Oil consumption is normal, especially in older vehicles. Regularly checking the oil level and adding small amounts as needed can help maintain a healthy oil level between oil changes.
The Importance of Consulting Your Owner’s Manual
While this guide provides a general overview of checking engine oil level, it’s essential to refer to your car’s owner’s manual for specific instructions and recommendations. There may be slight variations in dipstick location, oil type, and oil change intervals depending on your vehicle make and model.